One of my to dos this year is to start Friday favorites to round up what I’m loving that week. There may be two items, people, recipies, stories, round-ups etc or there could be ten. But this is a way to share what I find interesting, fun, want in my life or admire each and every week.CrockPot | Owl Measuring Cups| Booties | Dexter @ Netflix | Serving/Mixing bowls | Clever Fox ArtI’m pretty excited that the remaining seasons have been released on Netflix as I never was able to finish the last two seasons. If you don’t mind a little gore, it is an epic show from a very different perspective. What were you loving this week?
I used Photoshop CS3 for this tutorial. Everything works the same if not similar in newer programs as well as these processes can be transferred and used in free programs like GIMP with a similar setup. Step One We are starting fresh so you will need to create a new image. Step Two Be sure when you create your image you set the background to transparent. (If you forget use the magic erase tool on the white or whatever color background to completely remove it.) Step Three Chose the ellipse tool from your shape tool. Step Four Remember if you want a perfect circle hold down the Shift key. You can choose your color before or after. (After? look to the layers menu.) Step Five Add, draw, text, pattern… Whatever you want on your button. (If your image overlaps you can use the mask tool from layers box. Right click…
I know I usually misplace or forget to purchase a card for someone, last minute I have to create or find one online to print and so I’ve made four simple holiday greeting cards this season. I have them hosted through my google drive so you can just click on the link and download each pdf file from the link. This is completely FREE. (There is no watermarking on the images on the PDF this was only for the blog post.) These are all made to print on standard computer paper and folded. (Glue if you want it to be more sturdy.) Winter Snowflake PDF Santa Claus PDF Kid’s Christmas Tree PDF Chalkboard & Holly PDF Hope you enjoy and have a happy holiday season! Be sure to enter our two giveaways! A Free custom Blogpost Design & 9 Hand-drawn Holiday Cards!
This is a fun way to make headers or even your site header using Photoshop. The way you may go about this might vary slightly but the icons are the same. This was done on Photoshop CS3. 1. First you want to open your program and create new (from file menu). I normally set my bg as transparentso the end result will show up nicely against a number of backgrounds (Not just white). 2. Use the text toolto add the text you want. Adjust the font and text size to your desired look. 3. Locate your photo you want to use and drag or open it into Photoshop as well. (If your photo is very large I suggest re-sizing it so it is easier to work with.) 4. Drag and drop the photo from its window over to the image window with the text. The image will then lay on top of the…
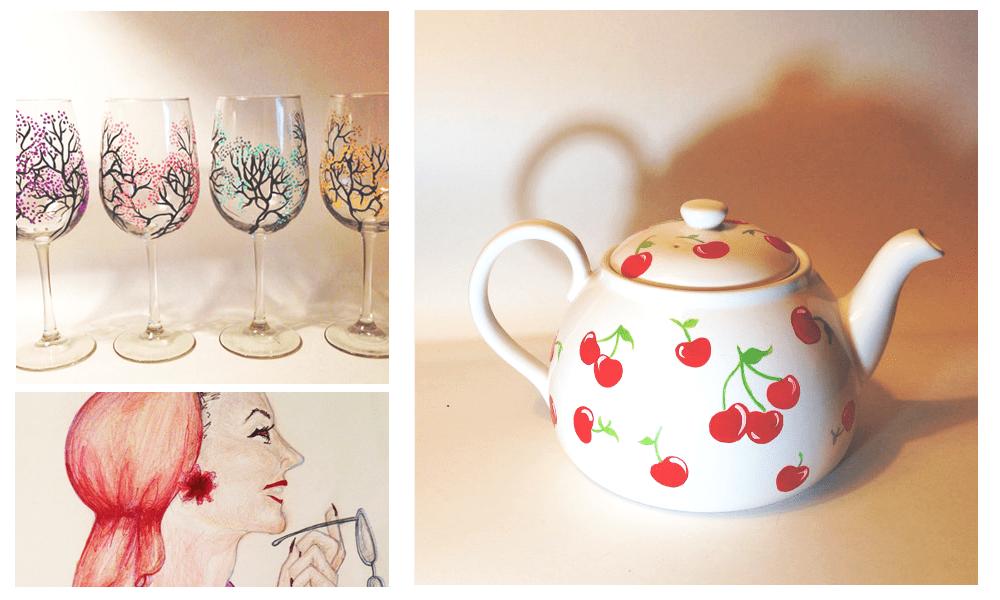
This week’s interview is with the lovely Melissa from Melissa Wynne Design. Her fabulous wine glass art is to die for be sure to check her etsy shop out for more freehand goodness. Keep reading to find out her advice for those of you who aspire to open your own shop or business! Crashbeauty: How did you come up with your shop name?Melissa: Originally I pined over clever names with cute references to the types of products in my store, but I knew that the direction of my work could change over the years, so I wanted to keep it simple and to the point. Melissa Wynne Designs.Crashbeauty: What inspires you when creating or choosing an item for your shop?Melissa: That can change from day to day. A lot of times I am inspired by nature and representing it in a unique way. Other times I am inspired by apparel…
Lamp -Target | Owl Wax Burner – Walmart | Greenhouse – IKEA | Planters & Plants – Linvilla OrchardsA while back I found this fantastic mimic, miniature greenhouse at Ikea for $20. I was looking to have a planter the size of the container but it turns out the size was odd and nothing fit properly. Recently I decided to go with just the planters, but I didn’t want boring planters. So the hunt was on for the perfect (and perfectly priced) planters for this greenhouse. The green planter I had from a previous plant. I purchased three of these lovely, colorful planters at Linvilla Orchards of all places. They were around $3-$5 a pop in different shapes, sizes, and brilliant colors. Seriously if I had my own place the boyfriend would have been in some serious trouble. I would have bought one in every color hehe. I also purchased…
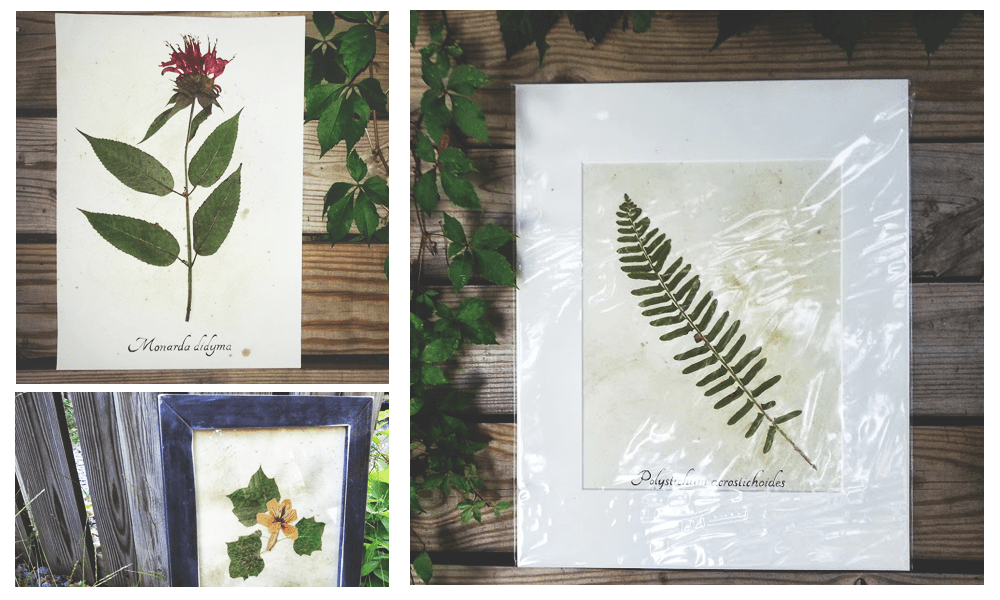
This lovely lady has an amazing shop full of gorgeous eco/botanical artwork at Ecobota . Keep reading below to find out more about this seller and their tips for starting your own business!We’ve also have the privilege in see their brand spanking new logo which is gorgeous might I add.CrashBeauty: How did you come up with your shop name?Sarah: My shop name is a combination of the words “ecology” and “botany” and stems from my passion for both of those fields of study. CrashBeauty: What inspires you when creating or choosing an item for your shop?Sarah: I am most inspired by the story of each plant. Some flowers only bloom for a short time and I must lay in wait, checking each day until the boom unfurls. But other times, I am caught off guard, pulling over on the side of the road to run back and examine the burst…
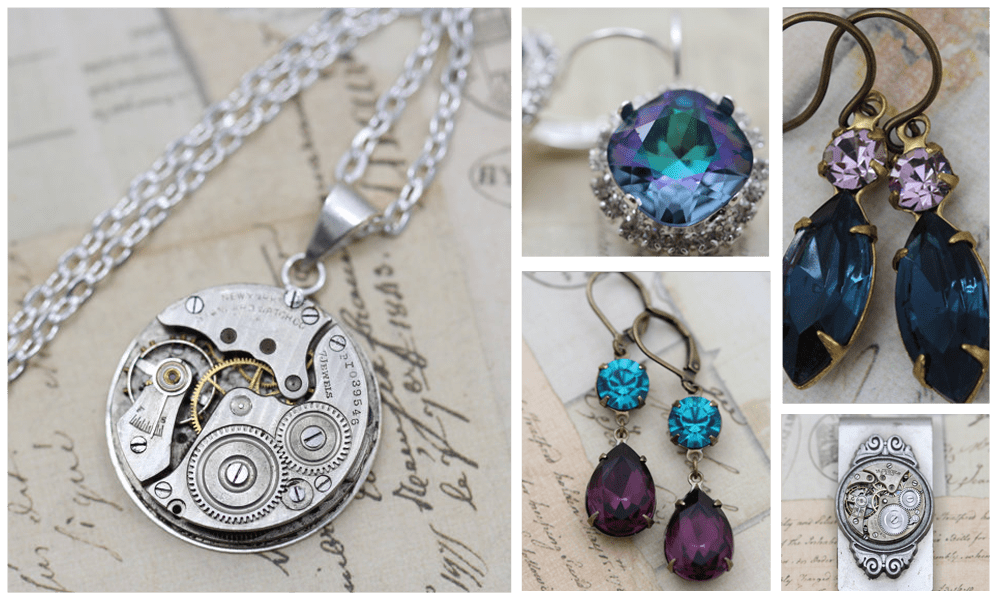
This lovely lady, founder of Inspired by Elizabeth, creates amazingly cool steampunk/vintage inspired jewelry pieces. Pieces run anywhere from $10 to upwards of $60. She also does custom pieces and specializes in bridal wear. Keep reading below for her interview!1. How did you come up with your shop name? This is actually a funny story. I wanted to name it Inspired because that was truly how I felt when I began creating my jewelry line. I was inspired by everything around me. I started my shop on Etsy and unfortunately the name was already taken (shocking I know). Etsy showed me a list of possible alternatives and one was Inspired by Elizabeth. 2. What inspires you when creating or choosing an item for your shop? I am inspired a lot by color, texture and just the overall feeling I get when I’m creating a piece. I love flipping through fashion…
I know when I started I had no idea of some of the tips I’ve written below. As a designer I see blogging from a designer point of view with an emphasis on making the experience as easy as possible for the reader. Reply to as many of your comments as possible. I can’t stress how annoying it is to love a blog, comment or ask a question on the regular to get no response, ever. Using an outside commenting system like disqus.com is helpful in keeping track of your comments and for readers to know they have replies. Also, disqus helps eliminate comment spam and you don’t have to annoy your readers with a cache to do it. Utilize snippets/breaks. Not everyone wants to scroll for a million years to get to content they want to actually read. Using snippets and breaks in your posts is a good way…
Now I’ve talked about Fortune Cookie Soaps but Aubrey Elizabeth Apothecary may have them beat! If you haven’t checked out her foodie fantastic soaps you should… just remember, don’t eat them!1. How did you come up with your shop name? I toyed with many different names, but settled on Aubrey Elizabeth Apothecary. I liked the idea of antique apothecary products, like using the blue jars and vintage style labels. I also envision finding unusual, sometimes weird treasures inside an apothecary. So for me it encompassed my body products and fun soaps. Using my name was to get across to customers that I do absolutely everything myself! 2. What inspires you when creating or choosing an item for your shop? As you can probably tell, I’m a total foodie and adore finding family run bakeries with little confectionery jewels. I love fragrances as well, so this creative endeavor matched up all…


